
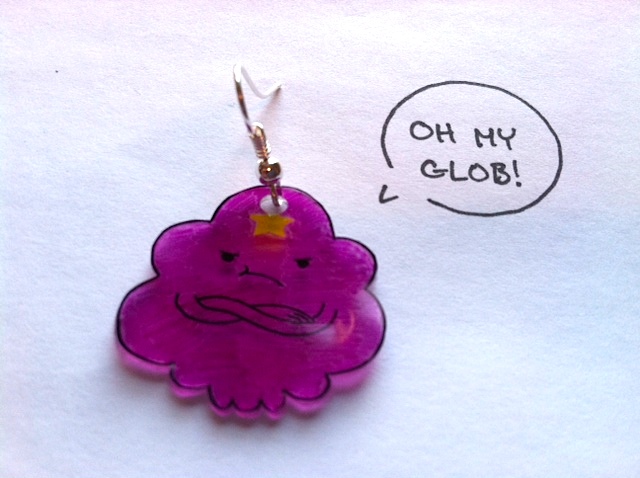
Oh my glob, you guys. You know what is the easiest craft ever to customize for your friends and famliy? Shrinky-dinks! They should be called Shrinky-DANKS because they're dank as shiz! (See my dinkin' tutorial about it here!) Anyways, my friend loves Adventure Time, so I whipped up a set of Lumpy Space Princess earrings for her birthday. Mathematical!
Today's post is also going to contain my two cents on gift presentation. Wrapping gifts is important because it maintains the surprise and protects the gift, but I think it should also add that extra pleasure of being aesthetically pleasant. When you're a kid, wrapping a giant sheet of Christmas-themed paper in a layer of tape is totally acceptable and adorable, but as an adult... I mean, come oooon.
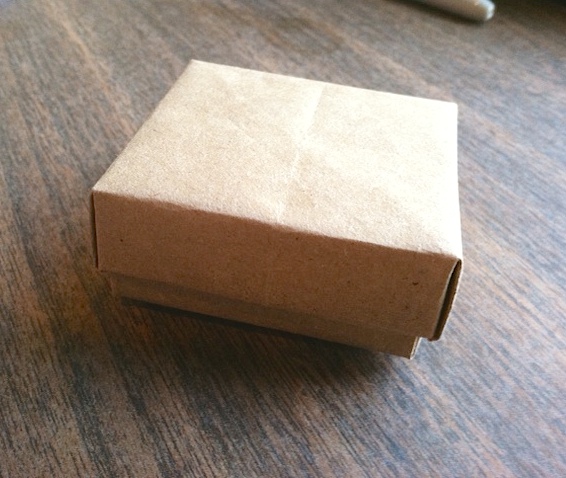
Now some people take gift wrapping to an extreme, but, you know what? I just am not going to go out and buy a lot of expensive wrapping supplies when there are so many simple and cheap materials lying around. So today I want to show you a really easy little gift box for small presents.
This guy was made out of a Trader Joe's paper bag, folded so that the printed side was covered. For step-by-step instructions on how to fold the box, see here. I also used a tiny bit of tape to hold the inside flaps down and secure the shape.
Today's post is also going to contain my two cents on gift presentation. Wrapping gifts is important because it maintains the surprise and protects the gift, but I think it should also add that extra pleasure of being aesthetically pleasant. When you're a kid, wrapping a giant sheet of Christmas-themed paper in a layer of tape is totally acceptable and adorable, but as an adult... I mean, come oooon.
Now some people take gift wrapping to an extreme, but, you know what? I just am not going to go out and buy a lot of expensive wrapping supplies when there are so many simple and cheap materials lying around. So today I want to show you a really easy little gift box for small presents.
This guy was made out of a Trader Joe's paper bag, folded so that the printed side was covered. For step-by-step instructions on how to fold the box, see here. I also used a tiny bit of tape to hold the inside flaps down and secure the shape.
The simple, kinda-rustic brown paper can be paired with cute ribbon, painted on, drawn on(I love the idea of just drawing on the ribbon and tag with a Sharpie). Tie it up with baker's twine or strips of washi tape. Draw a mason jar on it, whatever, go wild!
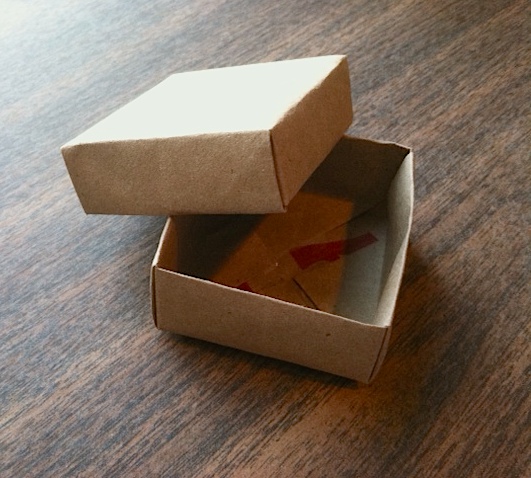
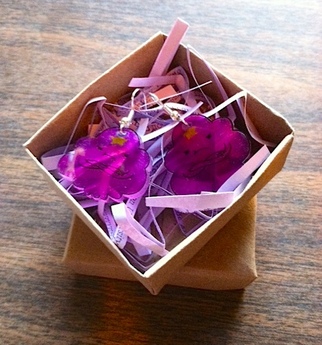
For filler, an easy material is thin little strips of confetti or Easter-grass-type shreds. I made the filler in this photo by folding a piece of colored printer paper back and forth a bunch of times and cutting the folded chunk into thin strips with scissors. Unfolded and fluffed a bit by hand, it made a safe nest for the earrings to sit in and added a little pizzazz(technical term).
Cost: free Time: 15 minutes

 RSS Feed