The crafting spheres these days are awash with DIY beauty salves, soaks, and scrubs. It's kinda neat to see this increasing interest in making your own products and all the luxurious variations people are coming up with.
Now, to put in my two cents, here's the recipe to what I call my Green Coffee Scrub!
(Misleading since there isn't any "green" coffee in it, but there is tea tree oil and olive oil and tea is green and so is the olive oil, so there!)
This scrub is my magical talisman against razor burn and ingrown hairs, which I found after much trial and error in an attempt to appease my unhappy legs last summer. I use it in the shower to exfoliate before shaving and on the next day or two after shaving. Before, it removes dead skin cells to give a closer shave, softens the hairs, and leaves a protective layer of oil on the skin to prevent razorburn. After, it prevents ingrown hairs by removing dead skin cells, killing bacteria with its tea tree antimicrobial powers, and of course moisturizes INTENSELY with the olive oil. Olive oil is one of those all-round great beauty secrets. It is antiinflammatory, it doesn't clog pores, and it actually enhances exfoliation. Tea tree essential oil is a great antiseptic, anti-fungal, and skin soothing agent.
PLUS the caffeine in the coffee and the scrubbing motion of using this stuff is supposed to fight the appearance of cellulite. No joke! I am usually pretty skeptical of things that claim to vanish cellulite, because (insert global beauty industry here), but I have actually noticed my skin becoming smoother. Go figure.
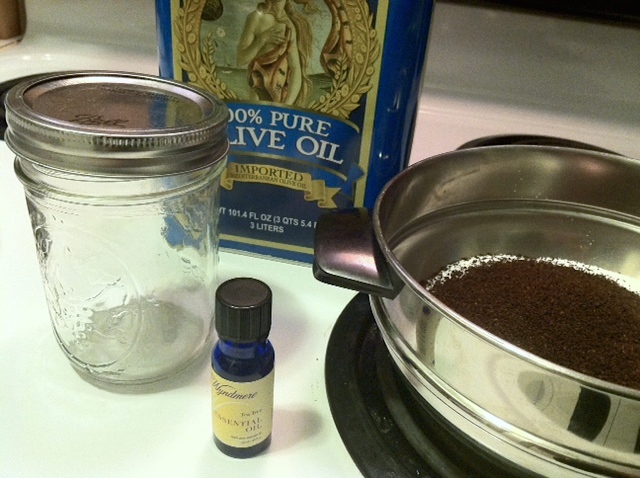
Ingredients
- 2 cups of sugar
- 2 tablespoons of ground coffee - since this scrub is going to sit around for a while in a jar, please don't use damp, used coffee grounds, as they can grow nasty bacteria after a short amount of time
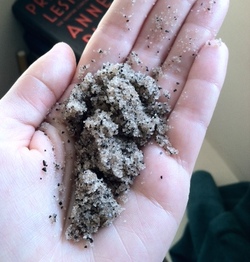
- 1/2 cup of olive oil or as much as needed to give your scrub a damp-sand kind of clingy/crumbly texture
- 6 drops of tea tree essential oil
- jar with a tight fitting lid
Directions:
1. Combine all ingredients with a large spoon or your hands in a large bowl.
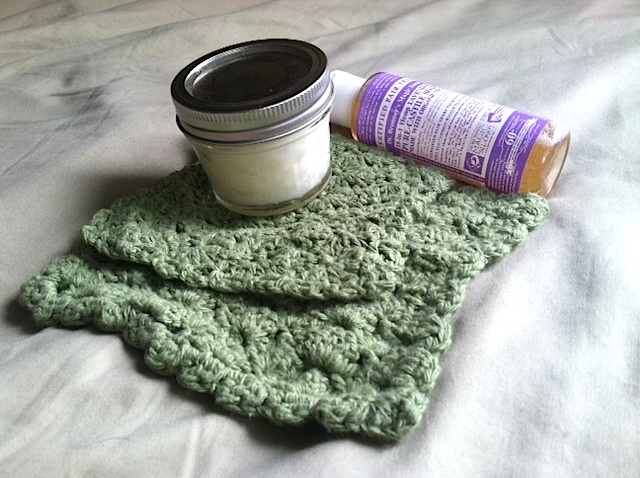
2. Using a smaller spoon, pack the scrub tightly into your jar.
3. Use in the shower, but make sure to keep any water out of it.
Recommended amount: about a tablespoon per leg
Tips:
- Because you're scrubbing this stuff onto your skin, you will be absorbing some of the caffeine from the coffee. If you're sensitive to caffeine, it might not be a good idea to use this right before bed, but otherwise, I find it to be a nice pick-me-up in the morning.
- Definitely use this stuff in the shower and rinse your shower down afterwards. The sugar will dissolve while you use it and run down the drain pretty easily when you rinse off, but, not gonna lie, the coffee can make a mess.
- I don't recommend wearing white pants immediately after using this. The olive oil sitting on your skin will be infused with coffee and could stain any light-colored clothes.
- 2 cups of sugar
- 2 tablespoons of ground coffee - since this scrub is going to sit around for a while in a jar, please don't use damp, used coffee grounds, as they can grow nasty bacteria after a short amount of time
- 1/2 cup of olive oil or as much as needed to give your scrub a damp-sand kind of clingy/crumbly texture
- 6 drops of tea tree essential oil
- jar with a tight fitting lid
Directions:
1. Combine all ingredients with a large spoon or your hands in a large bowl.
2. Using a smaller spoon, pack the scrub tightly into your jar.
3. Use in the shower, but make sure to keep any water out of it.
Recommended amount: about a tablespoon per leg
Tips:
- Because you're scrubbing this stuff onto your skin, you will be absorbing some of the caffeine from the coffee. If you're sensitive to caffeine, it might not be a good idea to use this right before bed, but otherwise, I find it to be a nice pick-me-up in the morning.
- Definitely use this stuff in the shower and rinse your shower down afterwards. The sugar will dissolve while you use it and run down the drain pretty easily when you rinse off, but, not gonna lie, the coffee can make a mess.
- I don't recommend wearing white pants immediately after using this. The olive oil sitting on your skin will be infused with coffee and could stain any light-colored clothes.

 RSS Feed