She's craftyyyy!
  • Blog
  • About
  • Contact
  • Disclosure Policy

DIY Beetlejuice Striped Jeans

6/26/2015

0 Comments

 
Picture
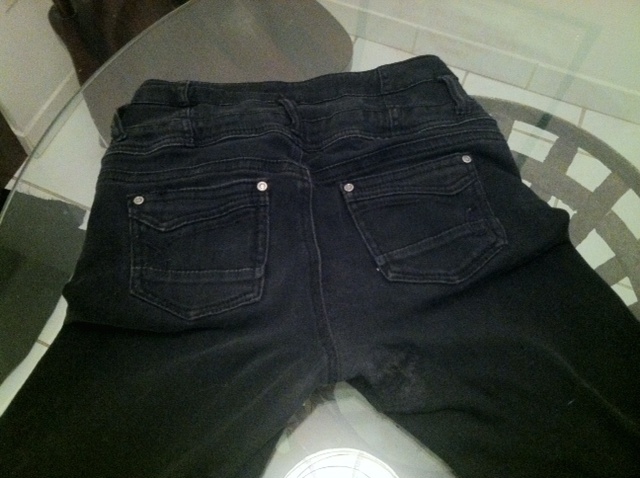
Recently, my favorite pair of black jeans split, right in the middle of the seat. This was the second hole I've had to repair, so I took it as the sad sign that they were ready for retirement...

...Or were they!? One of the best uses for old, patched up jeans(besides being worn as old, patched up jeans) is that you can feel less guilty about crafting with them. If you mess up, oh well, they were great while they lasted. If not... sweet!
So I bought some fabric paint and patched up these bad boys in preparation to make some fine striped pants(to wear to the goth club later that night). Keep reading for the tutorial...
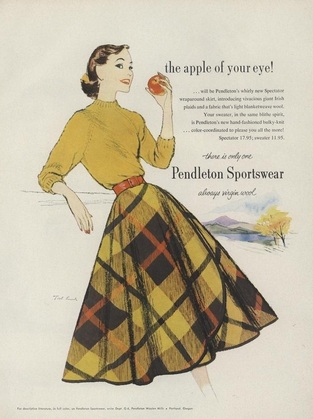
I've seen pants like these around and have coveted them greatly.
Mostly, I just want to be Tank Girl.
Picture
Picture
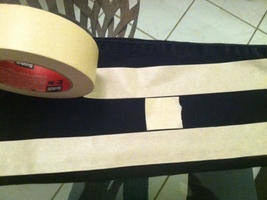
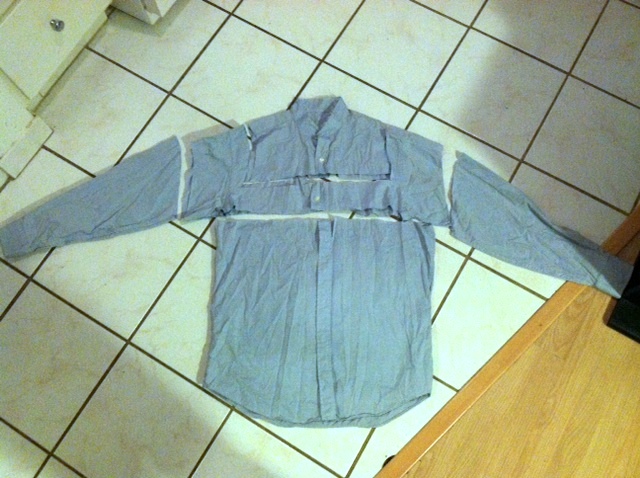
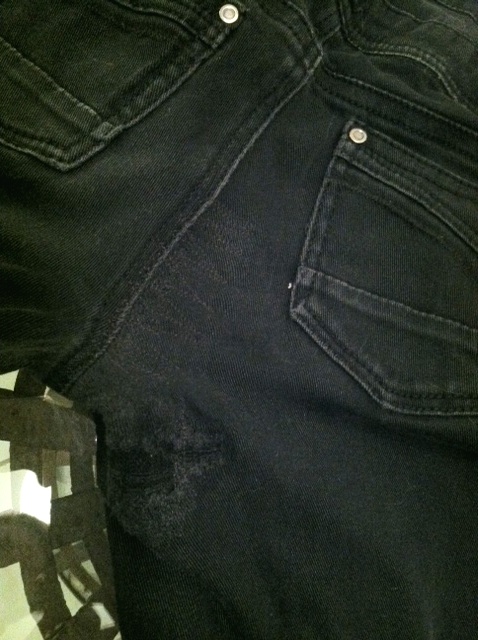
You can see where I patched an earlier hole on the upper thigh and the zigzag stitching over the new rip along the seam.
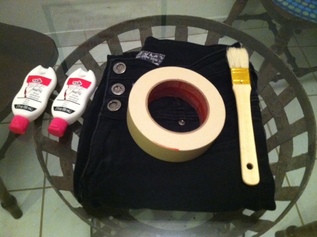
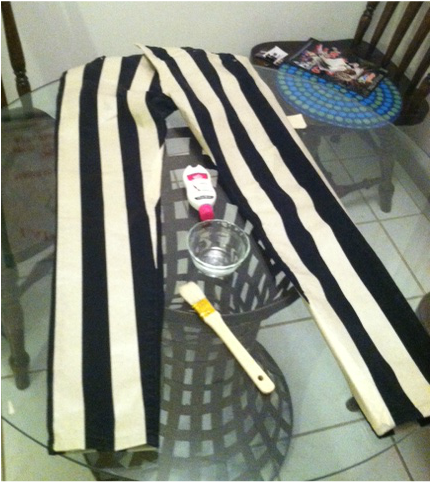
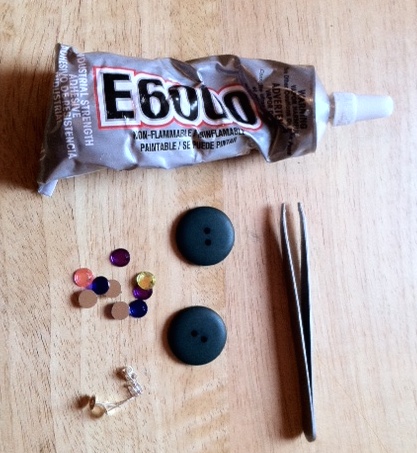
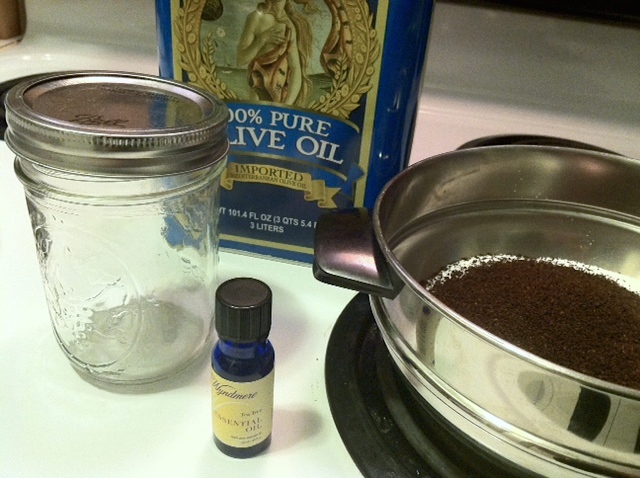
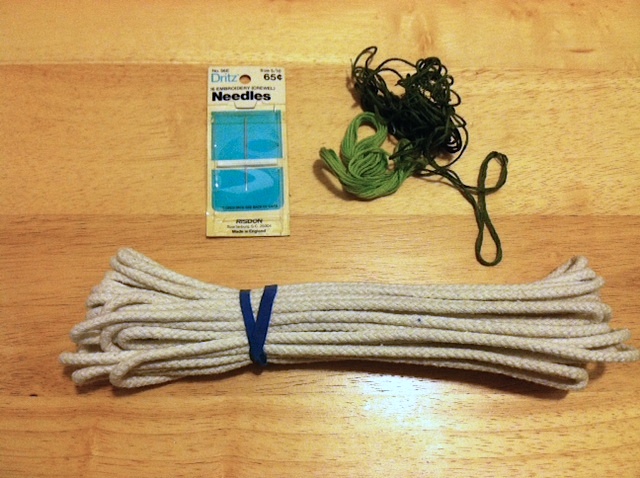
Picture
Materials:
  • black jeans
  • 4oz fabric paint(this covered what I wanted with absolutely none to spare, so buy more if you want to be safe)
  • wide regular or foam brush
  • masking tape or painters tape of the same width you want your stripes(or any width, but this sure makes it easy)


Step 1: First lay out your jeans as flat as possible, trying to make sure that the seam on the outside of the legs was facing up. Then place the first strip of tape by following the side seam of the pants. This ensures that the stripes follow the shape of the pants and look good.

Picture
Picture
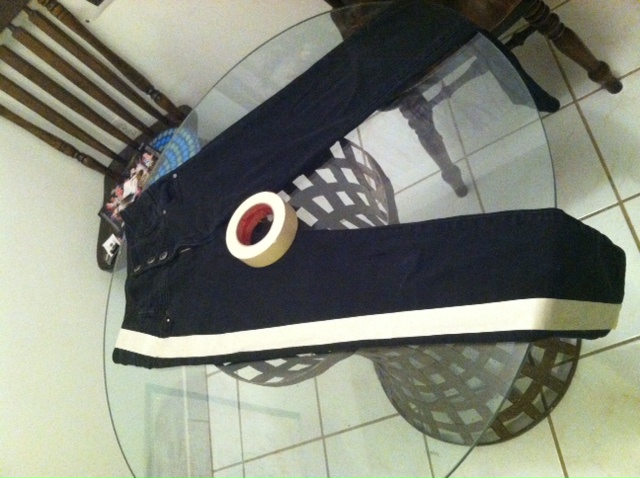
Step 2: Place the next strip of tape the same width away from the first, keeping them perfectly parallel along the leg and tapering together at the top(if your jeans are high waist like mine, which curve in at the top).

Tip: fold a small piece of tape back on itself so you have a little guide to keep the tape strips evenly apart.


Keep working from the outside seam in, so that the stripes are all parallel to the outside seam on the leg. Cut the strips of tape where they encounter the inside seam of the leg and definitely don't worry about them matching up evenly. You can kind of see in the photo below(especially on the left leg) how the strips of tape meet at the inside seam of the pant leg and how I cut them at angles to match the line of the seam.

Step 3: Now you're ready to paint! Take a second to run your fingers down each edge of the tape strips to make sure they are sticking to the denim. This will ensure your lines are nice and crisp. Pour out your paint into a dish of some sort and go to town on all of the exposed areas.
Like I said, I only bought barely enough paint for one coat. I am pretty happy with the result, however, as the visible brush strokes give it a cool grungy vibe. If you want your stripes to be nice and solid, apply at least one more coat.
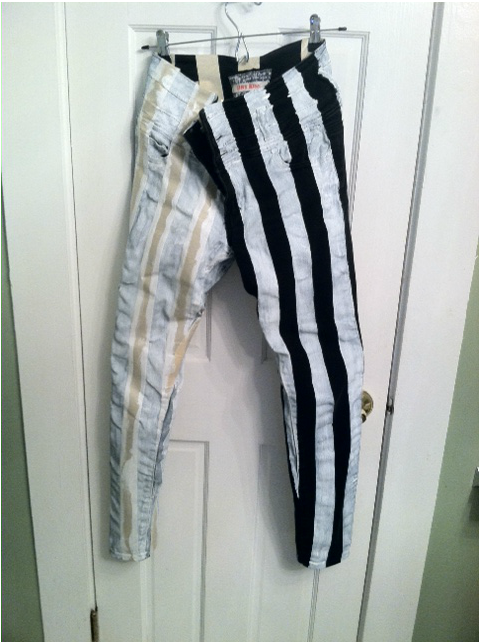
Follow the drying instructions for your paint. Mine said four hours, but I just hung them up in my bathroom overnight.
Picture
Here's what they looked like the next morning when I had to peek and took half of the tape off as I got ready for work. You can already see where I didn't follow my own advice and the paint crept under the edges of the tape along the creases at the waist.
Picture
Picture
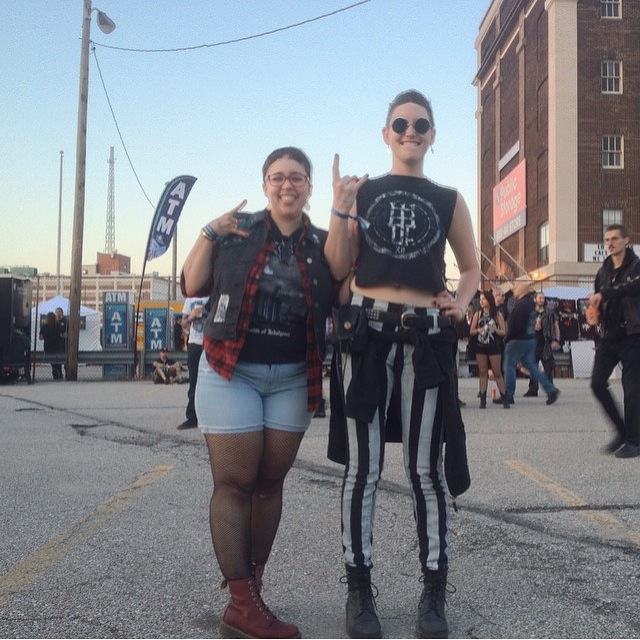
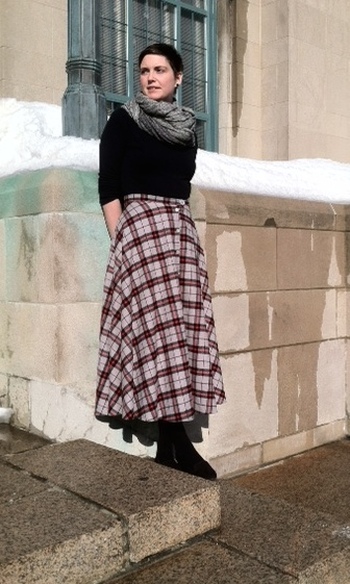
Here they are in action at Maryland DeathFest this year!
0 Comments

TShirt Upcycle - PRIDE Dress

6/26/2015

0 Comments

 
I made this dress for Boston Pride two weekends ago, and in honor of the historic ruling today, here is the tutorial for how I made it:
Materials:
- 6 tshirts, one of each color of the basic rainbow, at least as big around as your hip measurement. Make sure the red shirt( if you want red to be the top) fits well across the chest.
- thread of a color you don't mind seeing on each (I used black)
- sewing equipment(machine, pins, measuring tape, etc.)
Picture
Step 1: Measure how long you want your dress to be from the top of your shoulder. Subtract one inch(because we'll use the existing hem on the top and the bottom pieces), divide this number by 6, and add one inch for seam allowance. The resulting number is how wide you should cut each strip.
Let's say I wanted my dress to be 37" long from shoulder to hem.
37" - 1" = 36"
36"/6=6"
6"+1"=7" So I need to cut a 7" strip from each shirt.
Step 2:
Take the red shirt(if you want red to be the top of your rainbow), measure 7" down from the side of the collar, and cut a straight line across at that point. Take the purple shirt(if you want purple to be the bottom)measure 7" up from the bottom hem, and cut a straight line across at that point. Take the rest of the shirts and cut a 7" wide strip from the middle, so that it does not include any hems.
Picture
Notice my shirts weren't all the same width. We'll fix that later.
Step 3:
Measure the width of your top piece(which you should have fitted ahead of time). Make sure this width will fit over your hips and sew a seam down the side of each other strip so that they all measure the same width.
Step 4:
Sew the strips to each other using a zig-zag stitch, so that the seams have some give to them.
Step 5:
Try on your dress and pin down the sides to fit your torso more flatteringly. Remove and sew a straight stitch up the sides to these new measurements.
Step 6: Wear and be fabulous! Preferably with excessive amounts of glitter...
Picture
Excuse these awful pictures...
Picture
...I was so excited about Pride, I forgot to take better ones the day I wore it...
Notes:
I decided last-minute that I didn't want sleeves, so I cut the top to match my favorite tank top and zig-zag stitched around the edges.
To make the heart cut-out: Make/print a heart shape on a piece of paper, exactly the size you wish to cut out from the back of your dress. Take spare scrap of jersey fabric from one of the shirts that's at least as big as your heart pattern and pin it flat to the inside of the back of the dress. Pin the heart pattern in the center of the back, where you'd like it to sit, and sew a straight stitch all the way around the shape, using the edge as your guide. Using sharp(and preferably small) scissors, trim out both layers of fabric about 1/8" away from the inside of the heart shape you just sewed. On the inside, trip the spare fabric to about 1/8" around the outside of the heart shape you just sewed. This will help it lay flat, especially at the point.
Picture
As usual, Cake wanted to help.
0 Comments

DIY Flowy Blouse from a Men's Dress Shirt

3/27/2015

5 Comments

 
Picture
Just what the crafting spheres needed: another tutorial on how to modify a men's dress shirt into something cute to wear. That being said, I do love up-cycling projects, partially because you're reusing instead of throwing things away and partially because the materials are usually dirt cheap. Or free. This was my boyfriends old dress shirt before it sat in my fabric bin for a few months. I particularly like this style. It's a bit mod, a bit feminine, and loose and comfy.

Materials:
  • large men's dress shirt
  • matching thread
  • scissors
  • pins
  • sewing machine
Step 1: Remove the collar of the shirt by either unpicking the seam, or(if you are lazy like me) cutting it as close to the collar band as possible. After cutting off the collar, run your fingers around the edge you just made, pulling up all the loose threads. Carefully go around again and trim all of these threads back down to the collar base.
Step 2: Put the shirt on, buttoned all the way to the top, and mark with pins where the shoulder seam should be and where the flat yoke in the front will stop. The shoulder seam should sit right above the knobby end of your collar bone and the yoke should stop about an inch down from an imaginary line drawn between the tops of your armpits.
(Figure 1)
Step 3:
Take the shirt off again and lay it out as flat as possible. Make sure the seams are straight on the sides and the shoulders lie flat. Also, make sure that the pins you used to mark the shoulders match.
Step 4: Using pins, or a fabric pen, trace a line straight across the front on the pin that you used to mark the bottom of the yoke. (Figure 1)
Step 5: Using pins, or a fabric pen, trace a line down from the pins you used to mark the shoulders, mimicking the curve of the current shoulder seam, until they reach the line across the front.


Picture
Fig. 1 Mark at the shoulders and across the chest
Step 6: Cut along the three lines you just made.
Step 7: Take one of the existing sleeves and slip it up up your arm until it sits at the length you wish. Mark where the top of the sleeve hits that same point on your shoulder.
Using pins, or a fabric pen, trace a line down from the pin you used to mark the shoulder, mimicking the curve of the current shoulder seam, and cut along this line. Lay the shortened sleeve piece on top of the other sleeve and cut to the same length. Your shirt should now be in pieces like this:
Picture
Picture
If you have a cat, it may look like this.
Step 8: Overview: Remove the buttons and sew the front of the shirt closed and flat. Details: Take the big bottom piece of the shirt, unbutton it, and cut off the button hole placket as close to the seam as possible. With a seam ripper, remove all of the buttons from the button placket.(Figure 2) Turn the shirt inside out and position the raw edge you just cut so that it runs down the middle of the back of the button placket. Pin and sew a seam down the raw edge, about in the middle of the button placket. Turn it back right side out and sew another seam down the outside edge of the button placket. The raw edge should now be secured on the inside by two seams (Figure 3) and the front button placket should be sewn flat with one seam down the middle and one seam down the outside edge. (Figure 4)

Fig. 2 Remove button hole placket, remove buttons from button placket
Fig. 3 Inside view of the sewn placket
Fig. 4 Outside view of the sewn placket
Step 9: Overview: Gather the extra fabric of the body and attach it to the yoke. Details: Take the sleeve, bottom, and the yoke pieces. Lay the sleeves flat on top of their respective sides of the yoke, overlapping the edges a little to simulate the seam allowance. Lay the bottom(that you just finished sewing) out flat, right side out, inverted and upside down on top of both, with the button plackets aligned and together and the edges flush. Pin the yoke and bottom together in the center. The sides of the bottom should now be sticking way out beyond the edges of the yoke and sleeves. (Figure 5) Scootch the ends in(don't fold them over) until they align with the bottom outermost edge of the sleeve. Pin it in place on the outside edge of the yoke. You should now have a bunch of extra fabric in the bottom piece, pinned between the outside edge of the yoke and the center. Do the same with the other side. Using whatever method you prefer( I use the baste-and-gather method) gather the fabric between the 3 pins and pin it down to the yoke all the way across. (Figure 6)Turn the bottom over and gather the back side the same amount. Turn the bottom inside out and pin the back of the bottom to the back of the yoke in the same manner as you did the front. Sew both seams with a 1/4" seam allowance. Then, open the seams and press the seam allowance up towards the yoke. Sew another seam on top of this folded seam, as close as possible to the first seam, to secure it and keep it flat.
Fig. 5 Layout and pin in the center
Fig. 6 Gather excess bottom fabric and pin to yoke
Picture
Fig. 7 Sew another seam on top after pressing seam allowance up towards the yoke
Step 10: Overview: Finish the arm hole and attach the sleeves to the body. Details: Lay out the body of the blouse out flat again, inside out. Lay the sleeves flat on top of their respective sides of the yoke, overlapping the edges a little to simulate the seam allowance. Using pins or a fabric pen, mark the curve of the bottom of the sleeve onto the ends of the bottom which should be ticking out. Cut along these line to create the matching arm hole for the sleeve. (Figure 8) Pin the sleeve to the arm hole(put the sleeve right side out inside the body, which is inside out, matching the edges of the arm hole and sleeve) and sew together with a 1/4" seam allowance. (Figure 9) Open and press the seam allowance towards the yoke, sew another seam around the first, as close as possible to the first, to secure and keep it flat on your shoulder. (Figure 10)
Fig. 8 Cut arm hole to match curve of sleeve
Fig. 9 Pin sleeve to arm hole
Fig. 10 Press seam towards yoke and sew another seam on top
Step 11: Finish the raw edges, if you wish, with a zig-zag stitch or serger. Press and wear!
5 Comments

Easy Weekend DIYs

3/24/2015

0 Comments

 
Just a couple of quick projects I threw together when I was bored at home this past weekend. One of those stare-at-your-messy-crafting-space-until-ideas-pop-out-at-you kind of things.

Retro Glam Earrings
They remind me of the boxes and boxes of glitsy costume jewelry my great grandmother had.
Picture

Materials
  • silver earring posts and backs
  • two large buttons
  • misc. rhinestones
  • strong crafting glue
  • tweezers
Step 1: lay out all of your materials and play around with arranging the jewels on the buttons until you know how you want them.
Step 2: Squeeze a small amount of glue onto a piece of paper or cardboard. Using the tweezers, pick up each jewel and dip it lightly into the glue so that the back is coated and place onto the button. Place all of your jewels, then allow to dry.
Step 3: Once the glue has dried on the front, turn the buttons upside down on a flat surface. Dip the flat part of the earring posts into the glue, being sure to let it ooze over the top edge just a little, and affix to the buttons near the top edge.
Step 4: Allow to dry. Wear, and try to look as fabulous as my Nanny.
Picture


DIY Nail Decals

I cannot take credit for this method, there are a ton of other tutorials on this, but I can tell you that it is pretty easy and probably my new favorite nail-art method! You know, for when you want to get fancy. The best aspect, for me, is that it's a two-parter: one is a little mini-painting project and the other is doing your nails(which can be tedious if you're doing something elaborate) quickly and easily.
Picture
Materials:
  • assorted nail polish colors
  • nail art tools(or toothpicks if you're lazy like me)
  • a plastic baggy
  • a sharpie
  • nail file or cuticle scissors
Step 1: Put one hand in the baggy and trace around each nail with the sharpie on the surface of the bag. This will give you a good fit for the base of your nail to begin with, rather than just making a set of squares that you'd have to trim down afterwards. Do the same with the other hand. Be sure to keep your tracings apart on the bag and to label which is which.
Step 2: Close the baggy and flip it over so that the side you didn't draw on is up. (This keeps any sharpie from getting onto your decals) Take your base nail polish color and fill each of your tracings with a good, thick layer.
Step 3: Using the toothpicks, or whatever you wish, draw/paint your designs on top of the base layer you just put down. Once you're done, allow them to dry for at least 4 hours. For best results, let them dry overnight.
Step 4: When you are ready to apply the decals, use the end of a toothpick or the edge of your fingernail to CAREFULLY peel each decal off of the plastic. Lay them out carefully so that they'll be easy to grab when you're ready to apply.
Step 5: Paint your first nail with a layer of the same base coat you used on the decals. Blow on it slightly or allow to dry for 20 seconds, or until tacky but not wet.
Step 6: Pick up the matching decal with the tip of the forefinger of your other hand and place carefully on the nail, design side up, with the top edge flush with your cuticle(this is why you traced your nail in the beginning) by gently tapping it into place. Those first few seconds are critical if you need to adjust the placement, move it or lose it!
Step 7: Smooth the rest of the decal onto your nail by rocking the finger you used to place the decal around on the nail. Check for bubbles and smooth these out with either another fingernail or the side of a toothpick. Trim the edges with a nail file or scissors.
Step 8: Finish placing the rest of the decals, then let dry completely. Coat with a generous layer of clear polish and be sure to seal the edge. LET DRY COMPLETELY.
Step 9: Find elaborate reasons to wave your hands around while you're talking so people will notice your fine handiwork!
Picture
These were supposed to be some sort of urban floral pattern, but they kinda just look like amoebas.
0 Comments

DIY Infused Cooking Oil

3/9/2015

0 Comments

 
Picture
Everyone should do this because it is easy, delicious, and a little fancy-shmancy. Not only is it a piece of cake to make for yourself and wonderful to use in almost all your cooking; but small bottles would also make pretty, handmade gifts. I made the first batch on a whim a few months ago, and since then the BF and I have made a few variations to always keep on hand. It's especially good to use to cook stove-top popcorn(which, if you don't, you SHOULD) because the popcorn comes out so flavorful without having to add a ton of butter and salt.

You can infuse pretty much any cooking oil with any kind of flavoring you want(check the interwebs for ingredients that might not keep well) and there are more complicated methods of doing it; but our current, simple favorite is just to fill a mason jar(or old Sriracha bottle) 1/4 full of herbs, fill it completely with olive oil, and start using it the next day.

Here are our favorite recipes:
Garlic Herb Olive Oil
-fresh basil
-fresh rosemary
-lots of fresh cloves of garlic, cut in half
- around 1 Tbs of whole peppercorns

Hot Pepper Olive Oil - this one makes DIVINE spicy popcorn
-fresh jalapenos, sliced
-fresh habaneros, sliced
-few cloves of garlic, cut in half

And, in case you haven't done so yet, try making some stove-top popcorn. So much better, cheaper, healthier, and infinitely customizable.
Stove-top Popcorn
1. Buy a jar of popcorn kernels at the grocery store.
2. Add a few tablespoons of oil to a large pot with a lid and put on high heat.
3. Almost immediately, add 1/3 cup of popcorn kernels, and cover.
4. Stand by the pot, shaking it around every 30 seconds or so, until you start to hear them pop.
5. Shake continuously while you keep the pot on the burner, until the sound of popping slows down.
6. Remove from the heat and shake a little bit more until the popping stops.
7. Still in the big pot, add salt, spices, more oil, butter, etc. Cover with the lid again and toss to evenly coat.
8. Eat in large handfuls while growling at anyone who comes near.

Our favorite seasonings:
Savory: cook in garlic herb olive oil, add a dash of garlic powder, dash of salt, dash of cayenne pepper, dash of fresh-ground black pepper
Sweet: cook in coconut oil, add a dash of powdered sugar, dash of cocoa powder, pinch of salt
0 Comments

DIY Coffee Sugar Scrub

3/5/2015

0 Comments

 
The crafting spheres these days are awash with DIY beauty salves, soaks, and scrubs. It's kinda neat to see this increasing interest in making your own products and all the luxurious variations people are coming up with.
Now, to put in my two cents, here's the recipe to what I call my Green Coffee Scrub!
(Misleading since there isn't any "green" coffee in it, but there is tea tree oil and olive oil and tea is green and so is the olive oil, so there!)

This scrub is my magical talisman against razor burn and ingrown hairs, which I found after much trial and error in an attempt to appease my unhappy legs last summer. I use it in the shower to exfoliate before shaving and on the next day or two after shaving. Before, it removes dead skin cells to give a closer shave, softens the hairs, and leaves a protective layer of oil on the skin to prevent razorburn. After, it prevents ingrown hairs by removing dead skin cells, killing bacteria with its tea tree antimicrobial powers, and of course moisturizes INTENSELY with the olive oil. Olive oil is one of those all-round great beauty secrets. It is antiinflammatory, it doesn't clog pores, and it actually enhances exfoliation. Tea tree essential oil is a great antiseptic, anti-fungal, and skin soothing agent.
PLUS the caffeine in the coffee and the scrubbing motion of using this stuff is supposed to fight the appearance of cellulite. No joke! I am usually pretty skeptical of things that claim to vanish cellulite, because (insert global beauty industry here), but I have actually noticed my skin becoming smoother. Go figure.
Picture
Picture
Ingredients
- 2 cups of sugar
- 2 tablespoons of ground coffee - since this scrub is going to sit around for a while in a jar, please don't use damp, used coffee grounds, as they can grow nasty bacteria after a short amount of time
- 1/2 cup of olive oil or as much as needed to give your scrub a damp-sand kind of clingy/crumbly texture
- 6 drops of tea tree essential oil
- jar with a tight fitting lid

Directions:

1. Combine all ingredients with a large spoon or your hands in a large bowl.
2. Using a smaller spoon, pack the scrub tightly into your jar.
3. Use in the shower, but make sure to keep any water out of it.
Recommended amount: about a tablespoon per leg


Tips:
- Because you're scrubbing this stuff onto your skin, you will be absorbing some of the caffeine from the coffee. If you're sensitive to caffeine, it might not be a good idea to use this right before bed, but otherwise, I find it to be a nice pick-me-up in the morning.
- Definitely use this stuff in the shower and rinse your shower down afterwards. The sugar will dissolve while you use it and run down the drain pretty easily when you rinse off, but, not gonna lie, the coffee can make a mess.
- I don't recommend wearing white pants immediately after using this. The olive oil sitting on your skin will be infused with coffee and could stain any light-colored clothes.


0 Comments

DIY Maxi Flannel Skirt

3/2/2015

1 Comment

 
Picture
Photo Credit: Fred George III
Picture1950s Pendleton ad


Originally found this idea over at Pretty Quirky Pants. She has a great, detailed tutorial, so jump on over there if you're interested. In writing this post I realize that it must seem like I'm obsessed with button-down flannel skirts. I am not, particularly, but I was captured by the idea of the classic maxi tartan skirt. It's a beautiful and classic fashion staple with just enough of a vintage vibe to tickle my fancy.

Materials:
- 3 yards heavy flannel
- matching thread
- 10 small and one large matching buttons
- fabric scissors
- sewing machine
- measuring tape
- iron

Picture
Step 1: Fold your fabric in half length-wise. From one of the folded corners, measure along the fold to mark your waist radius(a) and skirt length(b). To calculate your waist radius, first measure around your waist where you want the skirt to sit, then add four inches. This measurement is your circumference, C. In my case, C = 27 inches + 4 inches = 31 inches.
As we all know from grade school math, the circumference of a circle is equal to twice the radius(a) times Pi. Do a little rearranging using algebra and you have an equation to calculate the radius from the circumference. (Don't worry, I've already done that, just use the second equation right there.)


Picture
Your skirt length, b, should equal however long you wish the skirt to fall from your waist. In my case, I just used as much length as I could get from the width of the fabric. Using pins or a light chalk pencil, mark two circles by measuring the skirt length and waist radius from the corner. Cut along both lines. From your remaining fabric, cut a rectangle about 3 inches wide and (waist circumference plus 2 inches) long. This is your waistband. As an example, my waist band piece was 3" wide by 29" long.

Step 2: Hem the bottom edge of the skirt by folding it in 1/4 ", pressing with an iron, folding again 1/4", and stitching down. Create the button placket along the straight edges of the skirt by folding them in 1/2", pressing, and folding again in 1", then stitching 1/8" in along the first folded edge.

Step 3: Press the shortest edges in by 1/2", then press your waistband piece in half with the nice side out, then open and press the long edges 1/2" in towards the fold. Pin the waistband to the top edge of the skirt so that it covers the top 1/2" of the skirt, extends one inch past the top(as buttoned) edge of the skirt, and is flush with the bottom(as buttoned) edge of the skirt. (see the following diagram for visual)
Sew 1/8" in all along the bottom and ends of the waistband.
Tip: Pin the ends first, then pin the middle of the waistband to the middle of the skirt, then kind of streeetch the curve of the skirt while you pin the rest. Otherwise, the curve of the waist can be tricksy to pin and pretends to be smaller than your waistband.
Picture
Step 4: Mark 10 places for your small buttons and button holes along the center of the button plackets of your skirt and finish the button holes on your sewing machine. Remember: the button holes go on the "top" side, the one to which we sewed with the inch of waistband extending beyond the edge, and the buttons go on the "bottom" side, just like the diagram above. Double check to make sure they match up, then sew on the buttons where you marked. Sew the large button hole in the center of the waistband overhang(so it's offset to the right about an inch from the line of buttons on the main part of the skirt) and mark and sew the large button on the other side.

The skirt, once you've finished, should look like this when laid out flat:
Picture
Step 5: Wear in coziness and enjoy! I've paired this skirt with leggings and a cardigan for work, knee-highs and a crop top for the goth club. Love it!

1 Comment

New Year's Projects

1/13/2015

0 Comments

 
Ah, January, the month after the holidays when I can finally craft for myself again. Fun discovery: Cake the Cat loves to help by sitting on all of the things. And I do mean ALL. Here are a couple of things I've been working on:
Picture
Black Leather Bat Chain Choker
This first one was a quick jewelry project that I've had rolling around in the back of my mind for a while. The chain was a $1 H&M find that I shortened for the project. I cut the bat shape from a piece of soft, thin black leather I had leftover from another project. Sketched my shape onto paper(after tracing the natural curve of the chain when it was fastened around my neck), traced it onto the back of the leather, cut it out with my trusty Xacto, and attached the leather to the chain by the corners using a needle and some strong black thread.
Easy, quick project that could be customized to any shape!
Tulle Skirt for New Years outfit
I was originally inspired by this tutorial here to sew a cute tulle skirt and decided to make it to wear for New Years. The original idea was to make this a circle skirt like the tutorial in that link, so as to avoid the tu-tu look and reduce the bulk at the waist. Unfortunately, I had an case of too many people giving me advice in the fabric store and I got confused and didn't get enough tulle. Damn my long legs and the inadequate width of fabric bolts!
Undeterred, I reassessed my fabric and everything came together to make a knee-length gathered skirt instead. Basically, I sewed tubes of all three fabrics and pleated one end of each until it matched the maximum stretched circumference of my planned waistband.
Then I layered them (hemming only the bottom layer of satin) and stitched them to the elastic with a zigzag stitch, stretching the elastic as I went to gather the fabric further to the final waist circumference. Easiest. Thing. Ever.
I spent a lot of time playing with the layers of tulle in the store and am very happy with the result: layer of dark blue satin as underskirt, layer of pale green tulle, layer of pale aqua tulle. It gives a kind of depth to the color and makes you think of deep ocean water. Got a lot of compliments while we were out for NYE. :)
Picture
Picture
Cake: "I'm helping!"
0 Comments

DIY Quiet Book

1/9/2015

0 Comments

 
Picture
It's nice knowing other people who have children, so I have some munchkin to make tiny, fun things for! For Christmas I decided to make my boyfriend's darling little niece and nephew a quiet book. Big book, lots of activities and things for little fingers to explore, to keep little minds busy and little voices down(you're welcome, parents!). Turned out to be a bigger project than I expected, with about a million little bits of felt, but I had a lot of fun putting it together, thinking of fun pages and applying all the details. Here are photos of the pages I made (apologies for the quality, it was 11pm and this was going in the mail the next day):
Picture
Page 1: Pocket contains letters to spell both kid's names, Little patched of velcro on the name tag to hold them in place.
Picture
Page 2: real laces to practice tying bows; Page 3: felt cupcakes attach to bits of velcro behind a an "oven door" that can swing open
Picture
Page 4: color matching game with pocket to hold pieces and velcro to hold them on the page; Page 5: beads for counting up to 5, can slide freely on string
Picture
Page 6: fishbowl-shaped pocket holds 4 fish of each color to play TicTacToe on Page 7: small clam shell opens to reveal a little pearl bead
Picture
Pages 8 and 9: house-shaped pocket holds a little felt car that goes travelling down these little roads
Picture
Page 10: little felt carrots and a radish fit into pockets in the "ground", felt tomatoes attach to their plants with velcro; Page 11: a rocket-shaped pocket carries two alien finger puppets
Picture
Closeup of the alien finger puppets. So cute!
While researching for this project, I discovered a bunch of websites dedicated to patterns for these books, with a million ideas for different pages to create. Here are some of the ones I got my ideas from:
  • http://quietbookblog.blogspot.com/p/template-directory.html
  • http://www.imagineourlife.com/2011/11/01/how-to-sew-quiet-book-pages/
0 Comments

DIY Coiled Rope Basket

12/15/2014

1 Comment

 
Picture
For some reason, I just love covering my vanity with little dishes and baskets and bowls to hold rings and earrings and all the miscellaneous stuff that shows up there. It makes the chaos seems a little more manageable, perhaps, all cutely divided up.
Anyways, here's an easy project to make a coiled rope basket, perfect for a little holiday gift. You can make it as big or as tiny as you like, it just depends on how long you keep a-coilin'.

Materials:
Cotton rope (of any thickness, but I used 1/4")
Embroidery thread
Embroidery needle

Picture
Picture


Step 1:

Tie the end of a long length of thread to the starting end of your rope. Make sure to tie the knot tightly!
Step 2:
Bend the last half-inch or so of the rope back over onto itself and wrap it tightly with 3 or 4 loops of the thread.
Double over
Wrap tightly!


Step 3:

Bend the wrapped end of the rope again back on itself again, so that now you have the start of a coil.
Picture
Picture
Picture
Picture
Picture


Step 4:

Flip the coil so that the loose end is now facing away from you and the thread is hanging down from the center. Wrap the thread out and away from you, up, and stitch down through the center of the coil using the needle. (Follow my words, not necessarily my picture; I realized I photographed this confusingly)

Do this again and again until you have fixed another coil of the rope around our initial one.


The basic principle of this basket weaving technique is to wrap the outside coil of rope to the previous coil, going around and around in a spiral. You need the needle to fit the thread between the previous coil and IT'S previous coil, NOT to sew the rope coils together by piercing the actual rope.


Keep going around and around until you've reached the desired size of your base...
If you finish a length of thread, tie it off and tie the next piece of thread to the same knot. Tuck the ends between the coils as you keep going, wrapping them into the weave of the basket.
Picture
Then start curving the shape of the basket up by coiling the rope a little higher with each revolution, until you reach...

...however high you wish it to be! Try playing with the colors of thread, for a fun twist (get it?)!!!
When you've reached the desired size of your basket, cut off the length of rope. Stitch several times around the end and the coil below just as you have been, stitching tightly and very closely together until you have sort of "capped" the end of the rope. Tie off the thread and use the needle to stitch it back through several loops to keep it from coming loose.
Picture
Taa Daa!
There you have it, my lovelies! Weave away!
1 Comment
<<Previous
    Picture

    Nora Jane

    This globetrotting craft-maniac  has settled down in Boston for a bit.

    Archives

    July 2014
    June 2014
    March 2014

    Categories

    All
    Cosmetics
    DIY
    Jacket
    Jewelry
    Nail Art
    Projects
    Sweater
    Tutorial

    RSS Feed


Powered by Create your own unique website with customizable templates.